CSS
In this section, we will add some simple styling to our web page to make it look a little nicer.
Centering elements
At the moment our page is a little wide. While this may be fine for smaller screens, paragraphs that stretch the full width of larger monitors can be more uncomfortable to read. We can fix this by setting a page width.
In index.html, surround all markup in the body with a <div> tag so you end up with the following (some markup has been omitted for brevity). This tag defines a general division of content and is very versatile. Inside the <div>, add a 'class' attribute with the value 'page'.
index.html
Find 'style.css' in the css folder and open it in your text editor. Add the following into it.
css/style.css
Open index.html in your browser (or refresh the page if it's already open). You should see that the content is now confined to the centre of the page.
CSS selectors
CSS rules use the following pattern.
Selectors allow us to target markup for styling. Once we have selected something, we can then modify various properties with custom values. These properties are contained within a pair of curly braces. Remember to place a semi-colon (;) after each value in a CSS rule.
Element selector
The simplest type of selector is the element selector. Here we write the name of the element we want to affect. This will define the styling for that element everywhere.
Class selector
This selector is extremely versatile since you can define classes that can be applied to any element. Class selectors are prefixed with a '.'.
For these to have an effect, we have to add a class attribute to the element we want to change in the markup. You do not need the preceding '.' here.
More selection options
We can select multiple elements and/or classes by separating each with a comma.
We can also select the children of an element by typing the child after the parent. This can be used to change the styling of elements in a certain area without affecting similar elements elsewhere in the document. For example, styling the links in the page navigation without affecting links elsewhere in the document.
Other selectors exist that allow you do more complex styling, but for now these should suffice. You may research these in your own time if you wish.
CSS properties
The following CSS rule selects all <h1> elements and changes their colour to red ('colour' is spelled 'color' in CSS rules).
The following CSS rule selects any element with a class of 'highlight' and gives it a green background colour. This may be useful for highlighting passages of text.
background-color
Change the background colour of the selected element. There are many pre-defined colours available, but you can also use hex codes and RGB values.
border
Place a border around the selected element.
color
Change the text colour of the selected element. There are many pre-defined colours available, but you can also use hex codes and RGB values.
font-family
Change the font of the selected element. If the font specified is not available, the browser will use the generic font as a fallback. Multiple fonts can be specified in a comma-separated list.
margin
Add space between the edge of the element and other elements. There are several ways to apply margin values and these are shown below. See the image to get an idea how it works.
A value of auto can be used to let the browser determine the margin.
padding
Add space between the edge of the element and its content. There are several ways to apply padding values and these are shown below. See the image to get an idea how it works.
Unlike margin, auto values do not work with padding.
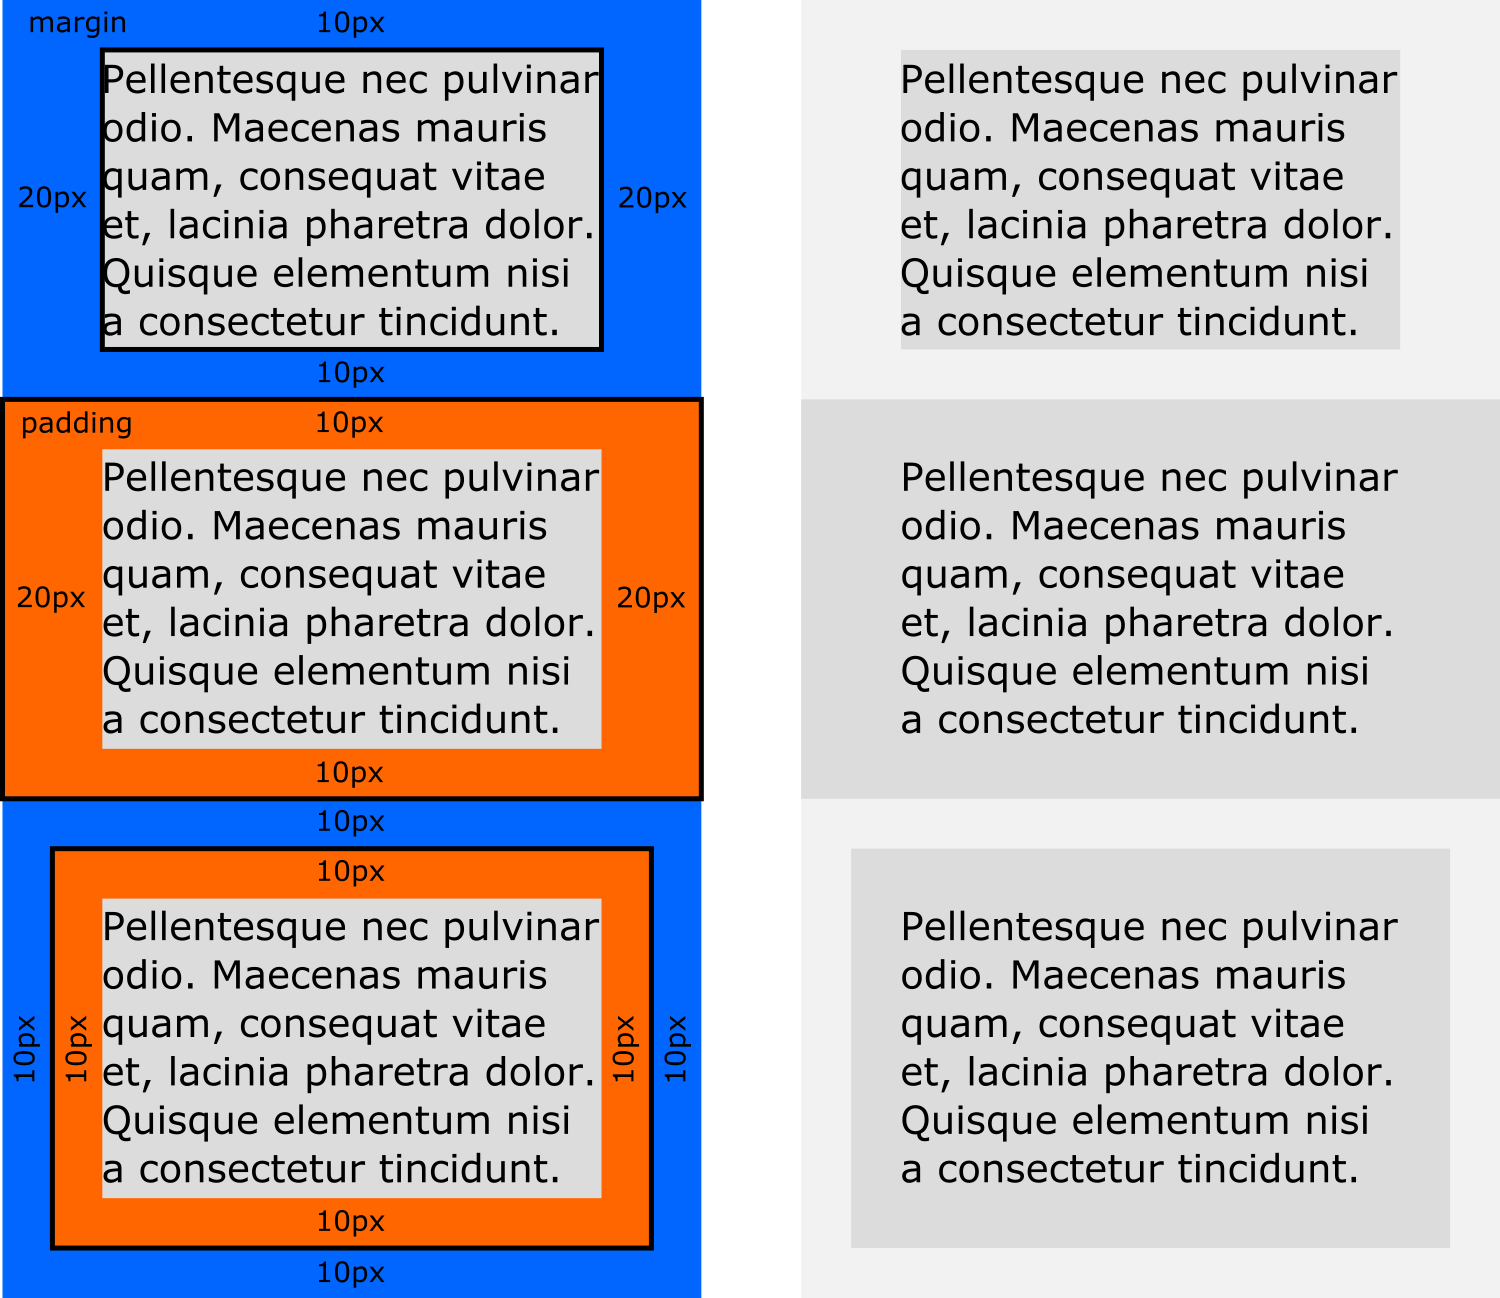
The black border indicates the outer edge of the element. As you can see, margin pushes the element away from other elements, while padding pushes the outer edge of the element away from the content inside. The CSS below shows the properties held by each element.
text-align
Change the text alignment of the selected element. Left is the default.
text-decoration
Add/remove various text decorations.
font-size
Change the size of text on the page.
width
Change the width of an element.
Applying CSS to HTML documents
Inline
CSS can be placed within HTML tags using the 'style' attribute. Overrides styling in the document head. Not recommended.
Embedded on HTML document
CSS can be placed between <style> tags in the document head. Overrides separate stylesheets.
Separate stylesheet
CSS can be stored in a separate document and linked to the HTML file that needs it.
There are several ways to apply CSS to markup, though in these tutorials we will only be using the last method listed above, separate stylesheets.
Consider the following. We have 5 web pages which each have tables on them. They are all styled the same way, using CSS in a style tag in the document head. At some point we want to change the styling of the tables. This requires us to go through each HTML document and to change the CSS rules each time. This ends up being rather time consuming, which would be even worse if each table had inline styling applied instead.
Now consider if that website was much larger, perhaps 200-300 pages, with around 150 tables throughout. A simple styling change would require manual updates to each page and could take hours to complete.
By using a single stylesheet and linking it to each page, we can change a single CSS rule and have it apply to all HTML documents at the same time. It's simple and efficient.
Having styling in the document head is fine for single page prototypes, but it's not recommended for production websites.
Inline styles usually only come up in specific circumstances, such as styling emails or markup styled by JavaScript. If you are able to use a separate stylesheet for your styling needs, you shouldn't be using inline styles.
Styling elements
There are a lot of simple things we can do to improve the look of a page. What we will do next is space out several elements, center the image, change the font, remove the bullet points from the list, and modify the appearance of the links.
In style.css, add the following CSS rule. This will change the font to Calibri and add a 15px padding to the top and bottom of all <h1>, <h2>, and <p> elements.
css/style.css
Then in index.html, find the line which has the <img> tag on it. Wrap it in a div with the class 'image' as shown and remove the width attribute.
index.html
Once you have done that, add the following CSS rules to style.css.
css/style.css
We can use a class to make the <div> center its content, in this case the <img>, using text-align, which actually affects more than just text. We can also control the width of images through CSS, which neatens up our markup a bit.
Units of measurement
There are many units we can choose from when building web pages. We will stick to using the two units detailed below for these tutorials.
- px (pixels) - An absolute unit of measurement where 1px equals 1 pixel of the screen. Pixel values tend to be fine on desktop, but may produce undesired results on mobile devices where pixels can vary in size.
- % (percentage) - A relative unit of measurement that allows you to create layouts that scale better to the size of the screen. For example, an element with a width of 50% will cause it to be half the width of its parent container.
Then, add the following CSS rules to style.css.
css/style.css
There are various options available to us when setting the style of bulleted lists, but sometimes it is desirable to remove them completely. The default underlining of links can be similarly removed. We also apply a margin to our <hr> tags to space them out a bit.
Refresh index.html in your browser. You should notice an improvement of how it looks. There is one last thing we will do before we move on however.
Find and modify the class 'page' in style.css by adding background-color and padding properties.
css/style.css
Then create a CSS rule that targets the <body> element and give it a background-color property. Choose an appropriate colour from the list and apply it to the property. I will be using 'lightblue' here.
In addition to this, change the colour of the links to something more appropriate for your choice of background colour. I will change the link colour to 'slateblue'.
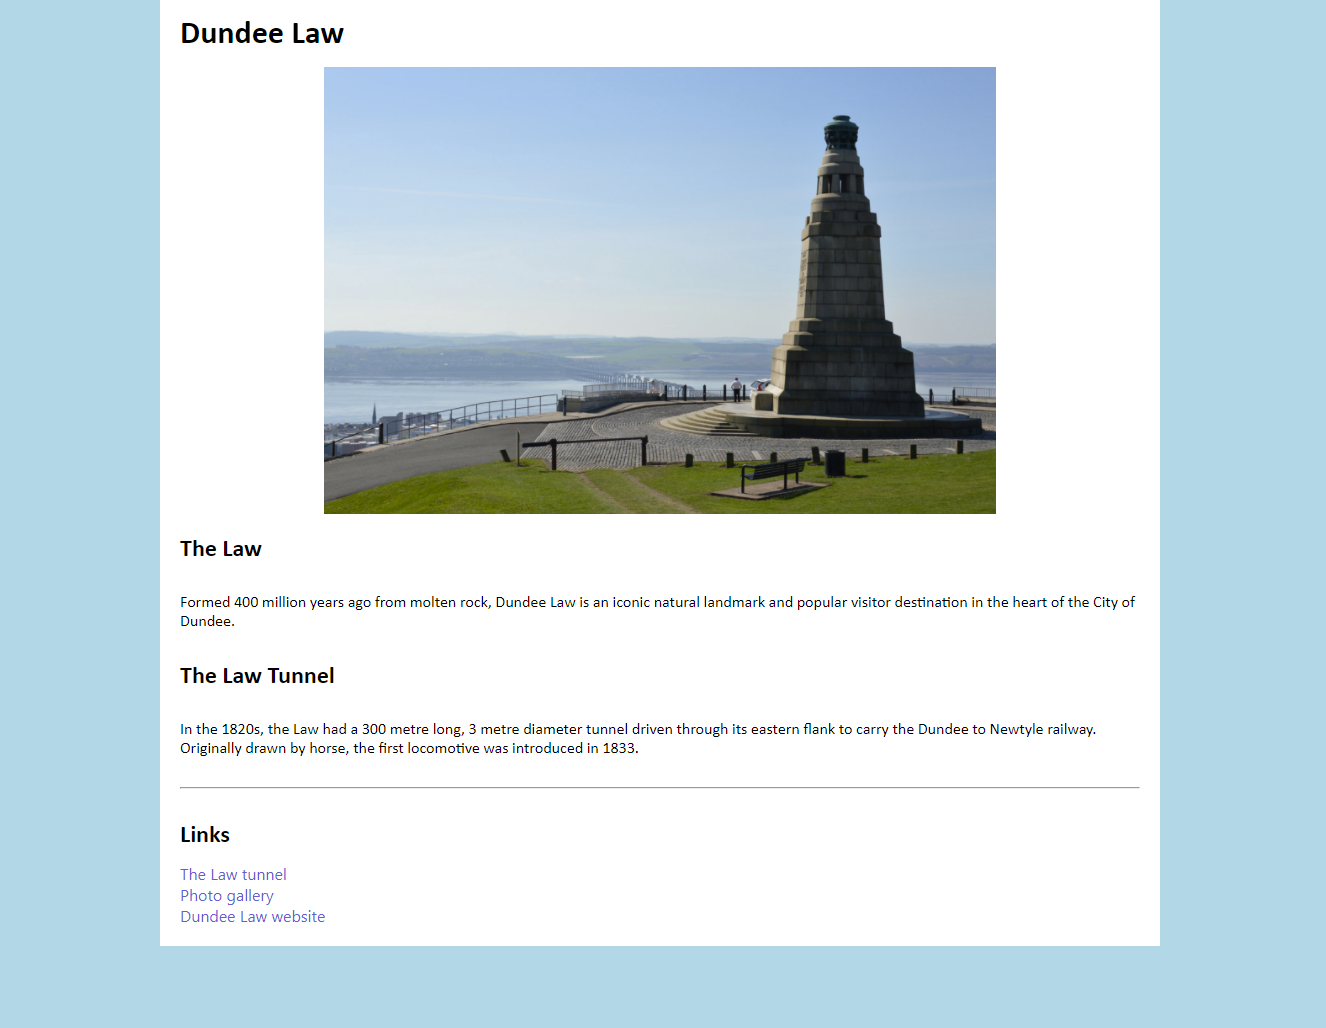
Current progress
When you refresh the page now you should see something similar to the following image.